Description
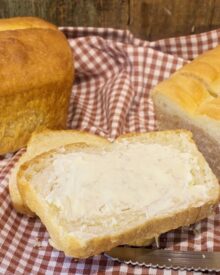
This soft & tender Buttermilk Bread is a great anytime bread. It’s great for sandwiches, french toast, slathered with butter, or toasted. It’s also great for freezing.
Ingredients
Units
Scale
- 1 packet dry instant yeast
- 2 teaspoons salt
- 4 1/2 cups bread or all-purpose flour, divided
- 1/4 cup granulated sugar
- 1 3/4 cups full-fat buttermilk
- 1/2 cup unsalted butter, (1 stick) divided
Instructions
Preheat oven to 160 degrees and turn off.
- Add the yeast, salt, and 2 cups of the flour to the bowl of a stand mixer fitted with the hook attachment. Lightly whisk the ingredients together and set aside.
- Add the sugar, buttermilk and 6 tablespoons of the butter to a small saucepan. Mix and heat over medium heat until mixture is very warm (110 to 115 degrees). The butter does not have to be totally melted. Remove from heat. Make sure it’s no hotter than 115 degrees before adding it to the mixing bowl.
- Add the buttermilk mixture to the mixing bowl and beat on low speed just until combined. Increase mixer to medium speed and beat for 2 minutes, scraping down the sides of the bowl with a spatula as needed.
- Add 1 cup of the flour and beat on medium speed for 2 minutes, scraping down the sides of the bowl as needed. Add an additional 1 1/4 cups of flour to the mixing bowl and beat on low speed just long enough to incorporate the flour. Turn the mixer to high and beat with dough hook for about 3 minutes. The dough should be stiff but smooth and elastic and should pull away from the sides of the bowl and cling to the dough hook and center of the bowl.
- Transfer dough to a lightly floured work surface. If the dough is sticky, add additional flour as needed, up to about 1/8 cup. Try not to use any more flour than is needed to be able to handle the dough. Form dough into a ball and place in a large greased bowl. Turn the dough over once to ensure that both sides of the dough are greased. Place a towel over the bowl and transfer the bowl to the warm oven. Allow dough to rise for 1 hour or until doubled in size. Remove from oven.
- Punch down the dough. Transfer the dough to a lightly floured surface. Divide the dough in half with a sharp knife or a bench scraper. Cover the dough with a towel and allow it to rest for about 10 minutes. Using a rolling pin, roll each half into a rectangle. Starting at a short end, roll each piece of dough into a cylinder, (like a jelly roll). Pinch the seam and ends and turn the ends under. Place the two dough cylinders, seam sides down, into 2 greased loaf pans, 8 1/2″ x 4 1/2″. Transfer the pans to a warm oven and cover with a towel. Allow dough to rise for 1 hour or until doubled in size. Remove from oven.
- Preheat oven to 375 degrees. Melt the remaining 2 tablespoons of butter.
- Using a sharp knife, cut a long line on the top of the dough, cutting 1/4 inch deep, the entire length of the dough. Brush the tops of the loaves with half of the melted butter.
- Transfer the loaves to the center rack of the preheated oven, making sure the pans are at least 2 inches apart. Bake loaves for approximately 30 minutes or until loaves are golden brown on top and are slightly pulling away from the sides of the pans. If the loaves start to brown too quickly on top, loosely place a piece of foil over them. Remove from oven. Allow loaves to cool for 5 minutes. Brush the loaves with the remaining melted butter. Transfer loaves to a wire rack to cool.
- Store bread loaves in an airtight container or plastic bag.
- Bread is best if eaten within 2 days.
- Bread can be frozen for up to 1 month if wrapped securely.
Notes
- Preparation time does not include rising time.
- You can choose to not slash the tops of the loaves if you prefer. The purpose of slashing the tops of some loaves of bread is to allow the carbon dioxide to escape, helping to prevent cracks in the bread.
- Use a serrated knife for easy slicing of bread.