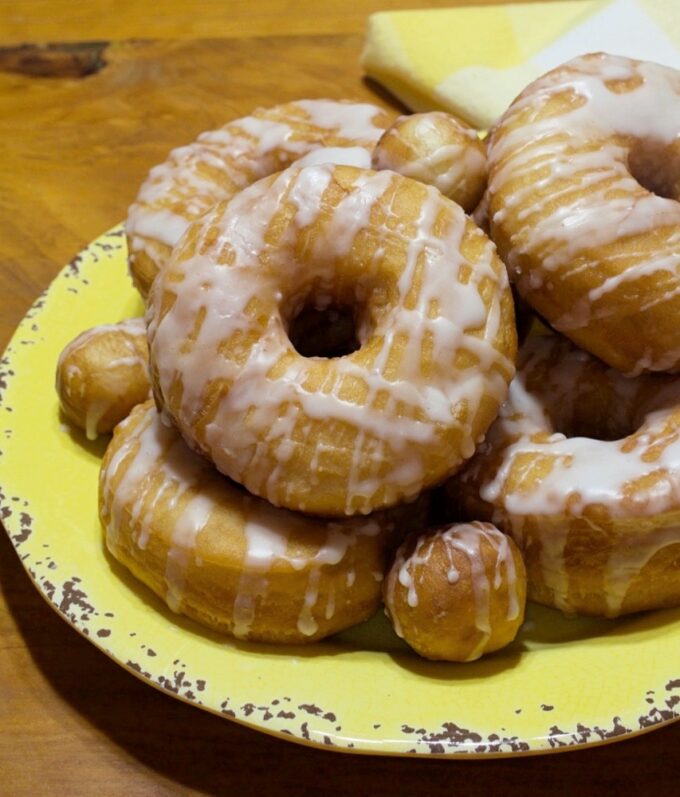
Glazed Yeast Donuts
The only hard thing about making these Glazed Yeast Donuts is the waiting. The dough goes through two rises, but the steps are super easy. They are soft and delicious with a drizzle of sugar glaze. The whole family will love them!!
You might think homemade yeast donuts are hard to make, but they really aren’t. The steps are easy and the only thing you need is some time and patience. The dough goes through 2 rises, and that’s the secret to light and airy donuts. It’s so worth the wait. You just have to trust me on this.
You might notice on some recipes, that I don’t illustrate each and every step of the recipe with photos. However, when it comes to recipes with yeast, such as this one, or any recipe that has several steps, I try to post a picture for each step. Although this recipe is easy, some of you might feel intimidated by the thought of using yeast if you’ve never before used it, so I’ll walk you through the steps here.
Yeast & Fermentation
What role does yeast play in making bread dough?
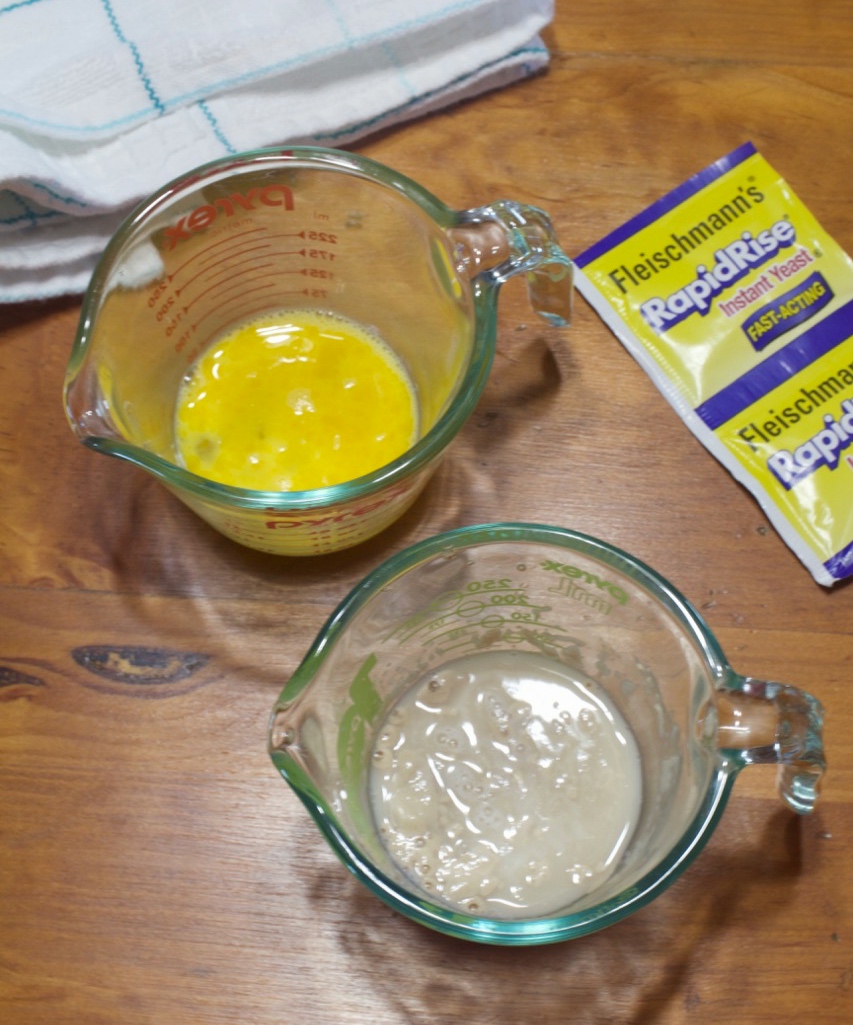
Yeast is the secret to making the dough rise. Yeast gets added to warm water and the water dissolves the coating on the yeast granules, exposing the active yeast that’s inside. The yeast interacts with the sugar and releases carbon dioxide. This causes the foam and bubbles to form on top of the yeast mixture. This is proof that the yeast is alive, also known as proving. Anytime you’re using yeast in a recipe, it’s best to test the yeast to make sure it’s still alive before adding it to your recipe. If it’s no longer alive, your bread won’t rise.
I prefer to use ‘fast-acting” or “rapid-rise” yeast in any bread dough that I make. The fermentation process starts with the yeast. I added the dry yeast to warm water and allowed it to rest for 5 minutes until the yeast began to form bubbles on the surface. This recipe calls for one beaten egg. I added the egg and the wet yeast mixture to other ingredients in the steps below.
Here’s what I did to make the dough…
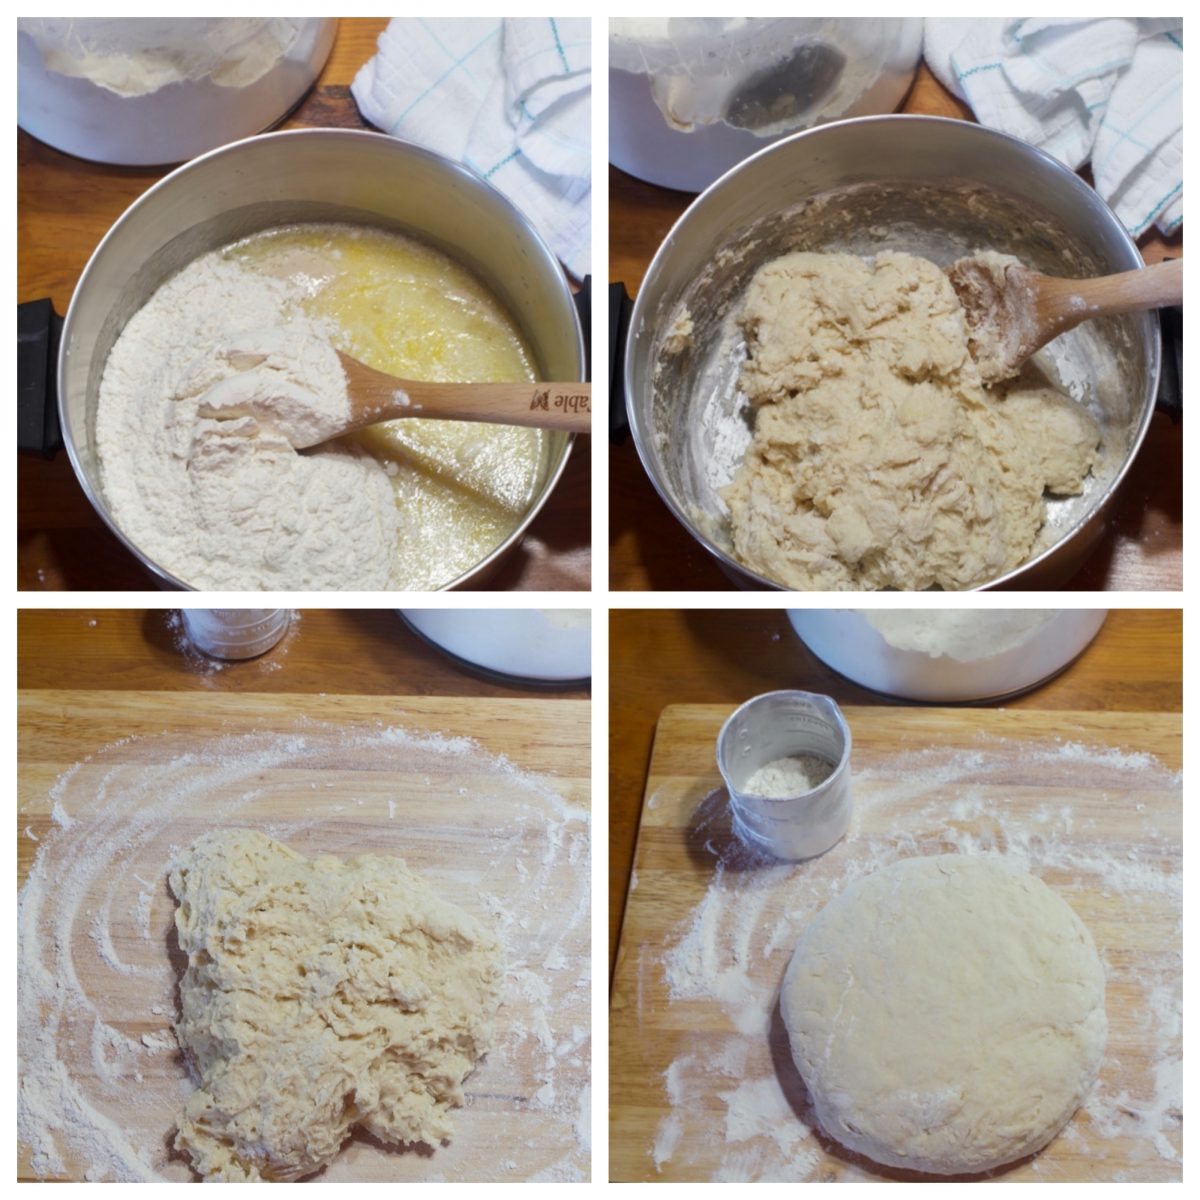
Top Left – I brought some salt, sugar, milk, water, and solid shortening to a boil over medium heat then cooled it. I added a beaten egg and the yeast mixture, then slowly added flour one cup at a time and mixed it with a wooden spoon.
Top Right – I stopped adding flour when the dough held together but was still wet. The recipe calls for 4 cups of all-purpose flour. I used about 3 1/2 cups and saved the last 1/2 cup for working into the dough once I dumped it onto my work surface.
Bottom Right – I used my hands and worked the dough until it was no longer sticky and formed it into a round disc. This dough doesn’t really need much kneading. I only folded it over with my hands a couple of times while dusting it with additional flour until it was no longer sticky and wet.
First Rise
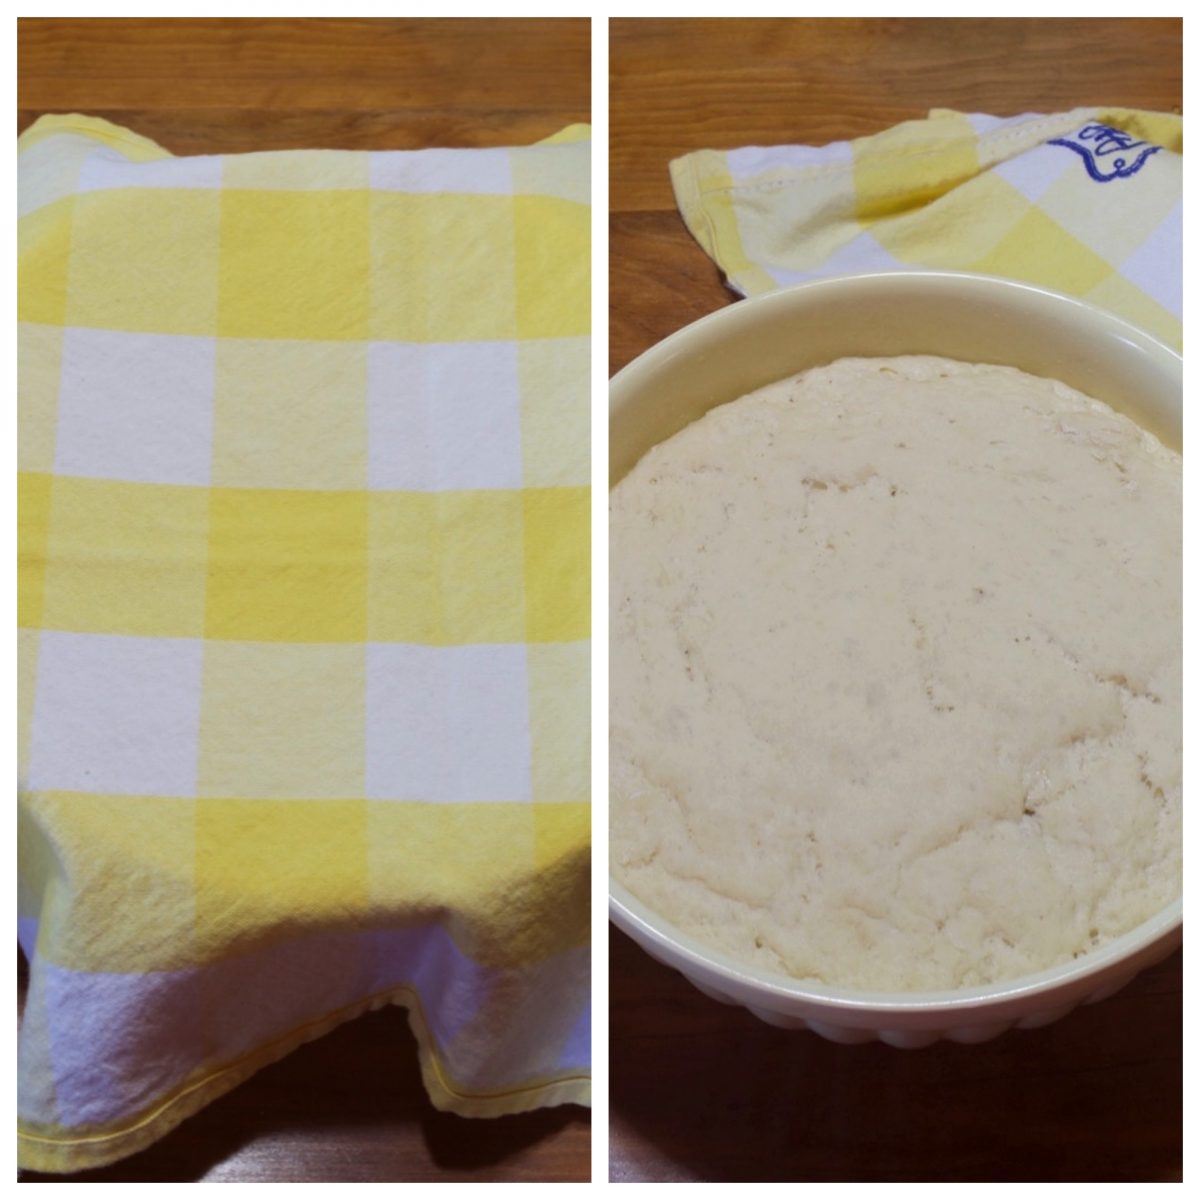
Left – I placed the ball of dough into a greased bowl, turning it once so that both sides were greased, and covered it with a towel.
Right – I placed the bowl in a warm oven and allowed the dough to rise until it was almost doubled in size, about 1 hour.
Temperature – Once the yeast dough is made, it needs a warm place to grow. Here’s my easy tip for that. I preheat my oven to 160 degrees and turn it off before I start the recipe. By the time I prepare the dough, the oven is just nice and warm. This is a perfect environment for the yeast to grow.
Second Rise

Once I allowed the dough to rise for the first time, I punched it down and transferred it to a floured surface, and dusted it with a little more flour.
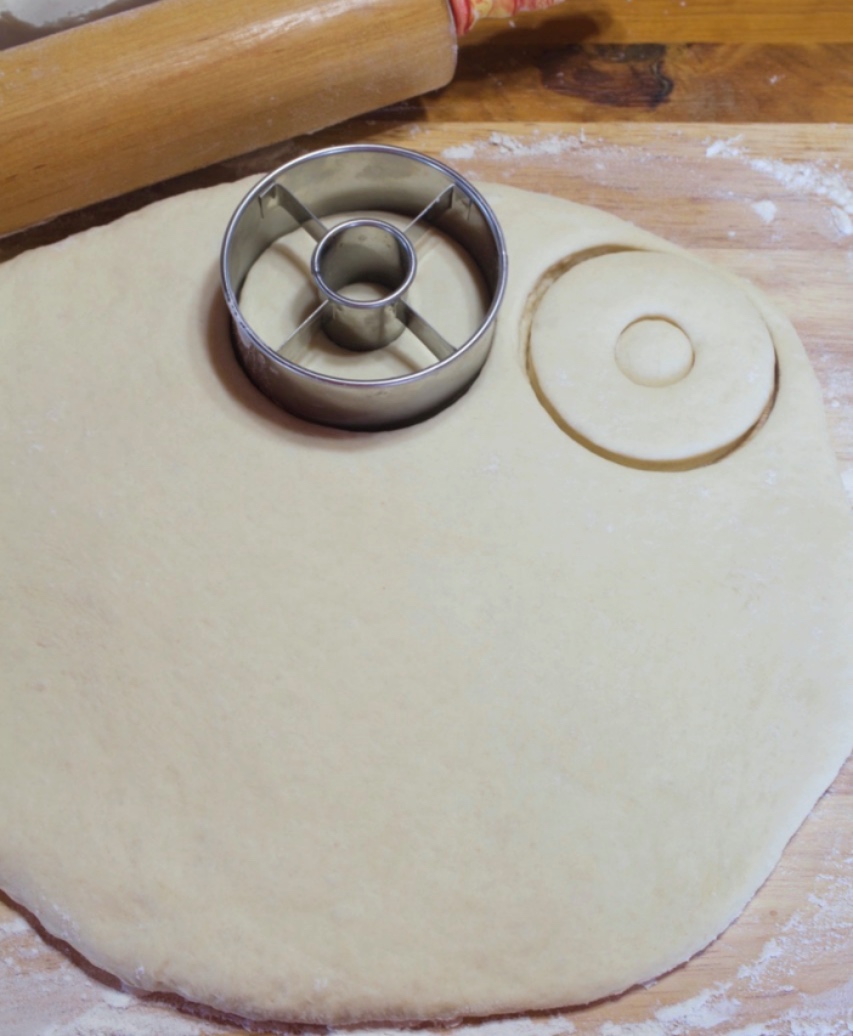
I rolled the dough out to about 1/3 inch in thickness and cut out my doughnuts. Next, I placed the doughnut cutouts on a parchment-lined cookie sheet and placed them back in the warm oven, allowing them to rise a second time. The second rise only took about 40 minutes.
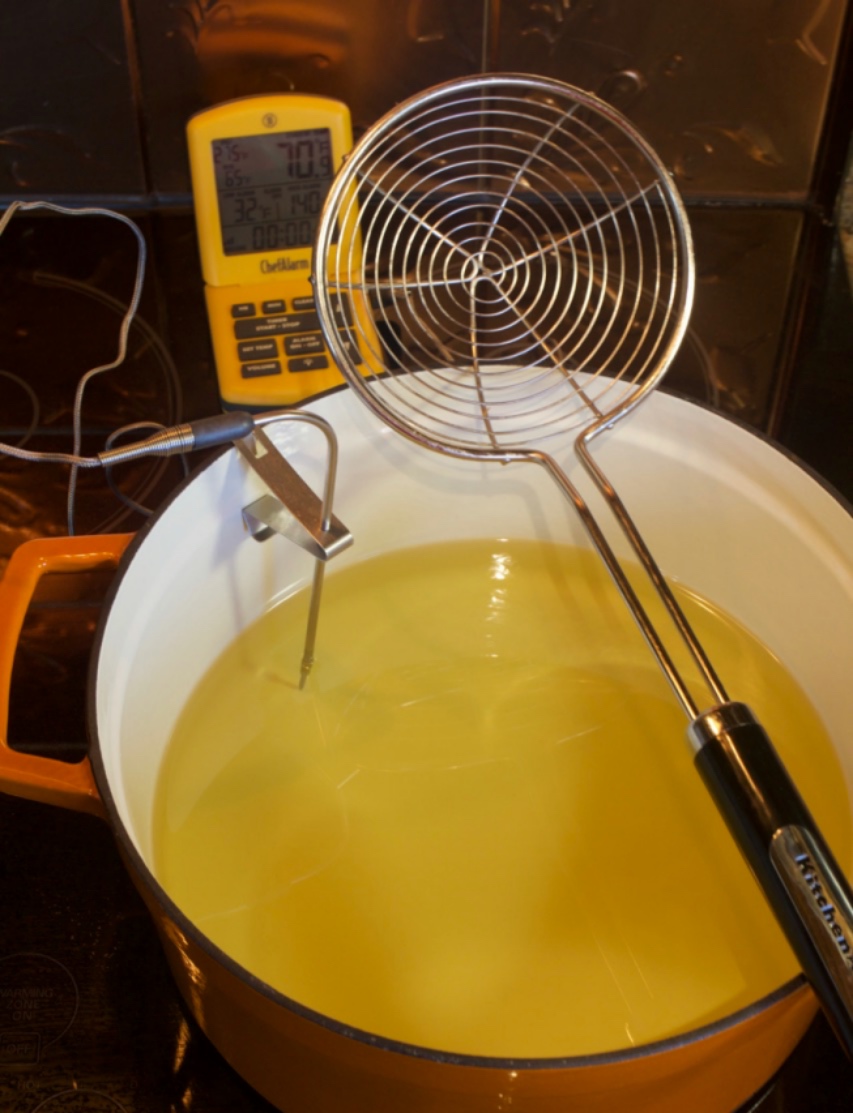
Once the donuts were almost finished with their second rise, I heated some canola oil in my dutch oven. The oil needs to be at 350 degrees. I used a thermometer to ensure the oil was hot enough. I dropped a donut hole in the oil to test it.
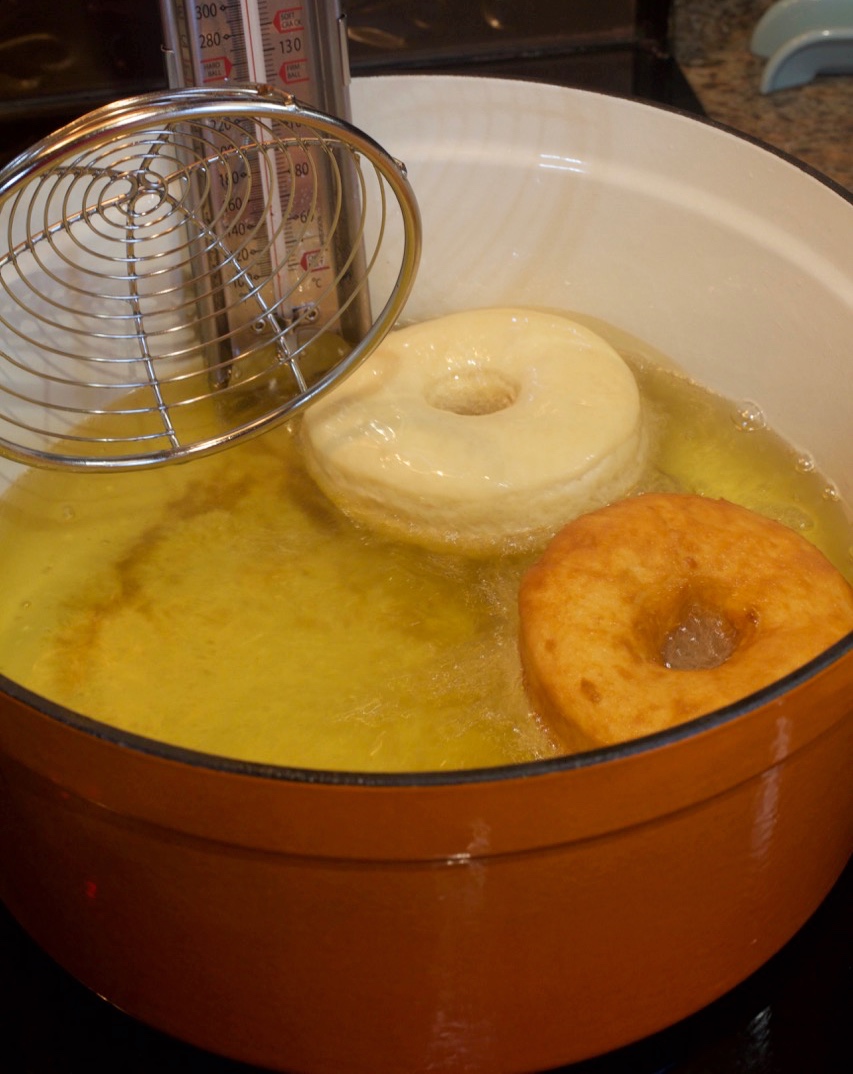
I used a spider for lifting the doughnuts from the hot oil. However, any large slotted spoon would work as well. I transferred the hot donuts to a wire rack that I had placed on a parchment-lined cookie sheet.
Donut Glaze
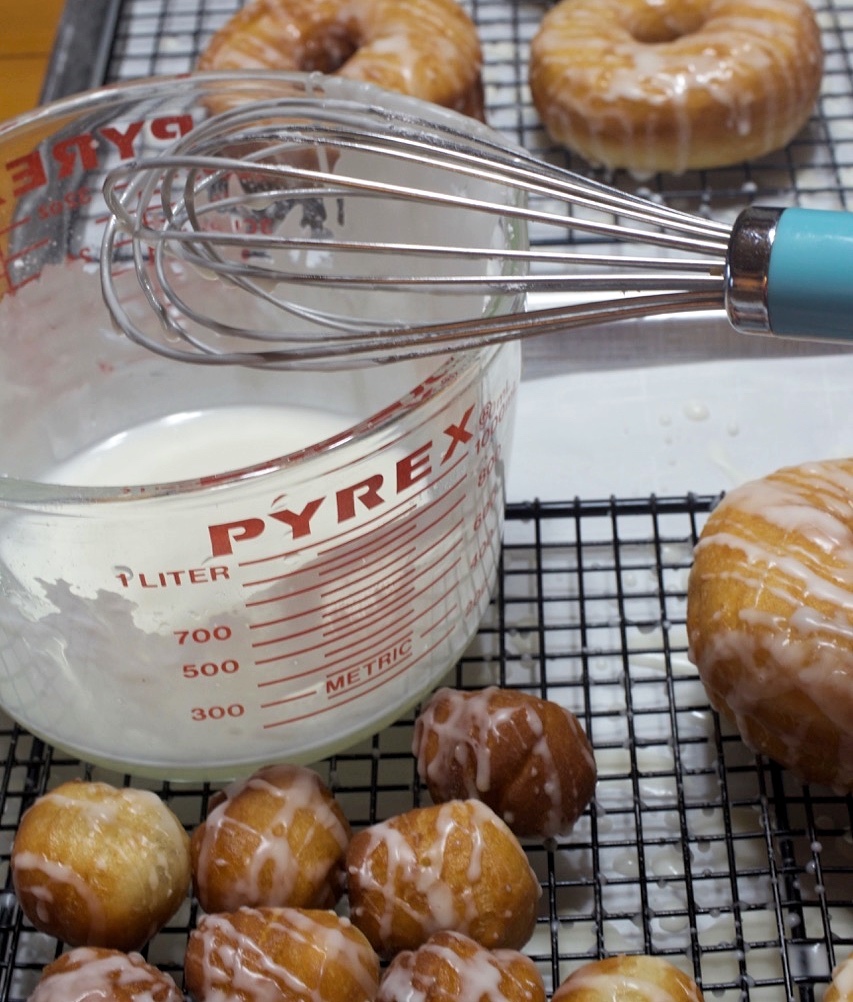
The glaze is super easy. I simply whisked together some milk, salt, and powdered sugar, making a thin glaze.
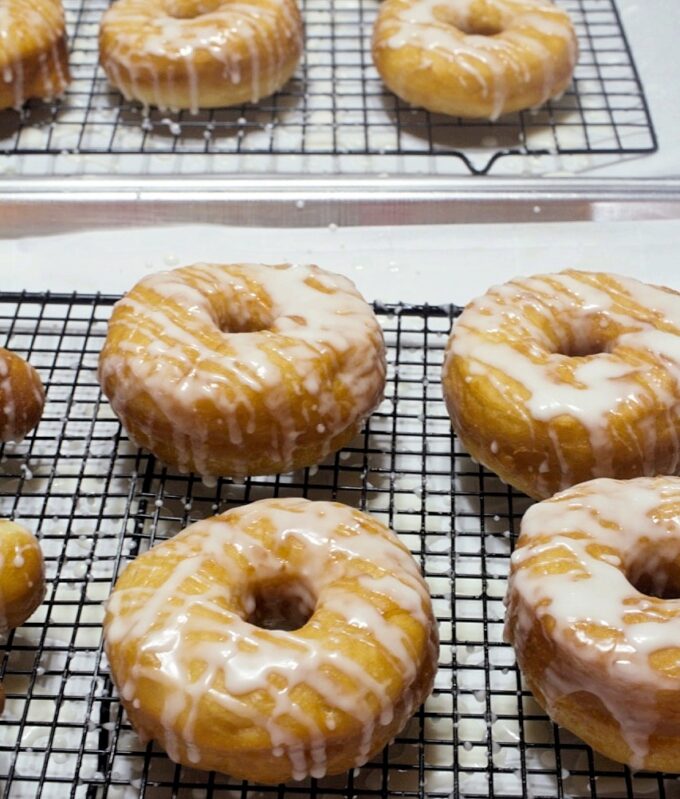
I used my whisk to drizzle the glaze back and forth over the donuts. The rest is sweet history!!
Check out these other great breakfast recipes…
Sour Cream Buttermilk Pancakes
Blueberry Biscuits with Lemon Glaze
Print
Glazed Yeast Donuts
- Prep Time: 2 Hours 15 Minutes
- Cook Time: 20 Minutes
- Total Time: 2 hours 35 minutes
- Yield: 12 Large Donuts, plus holes 1x
- Category: Bread
- Method: Fried
Description
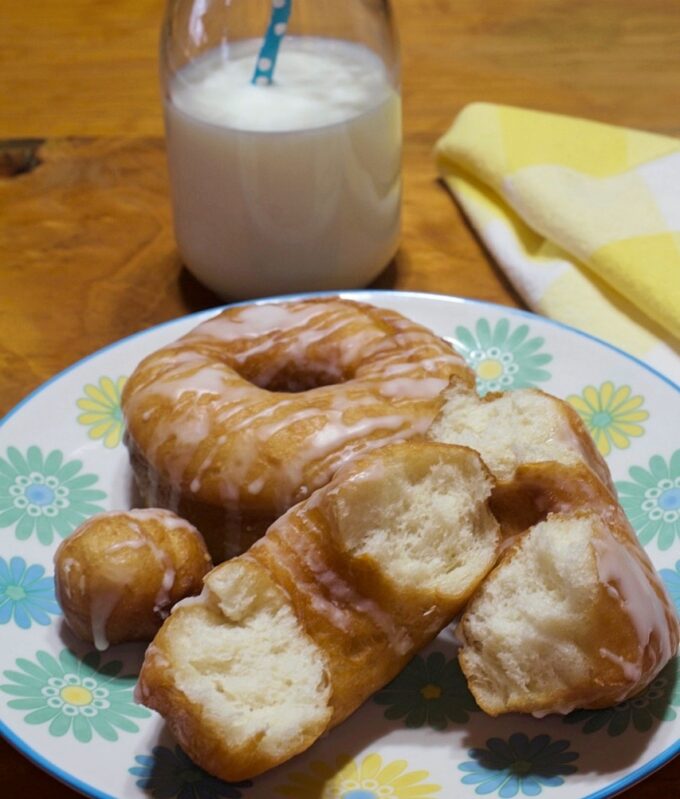
These light and airy glazed yeast donuts get drizzled with a simple sugar glaze and they are melt-in-your-mouth delicious. I promise!
Ingredients
FOR THE DONUTS
- 1 teaspoon salt
- 3 1/2 tablespoons solid shortening, such as Crisco
- 4 1/2 tablespoons sugar, divided
- 2/3 cup milk
- 2/3 cups water
- 1 egg, beaten
- 1 packet yeast (I use rapid-rise)
- 1 teaspoon vanilla
- 4 cups all-purpose flour
- 1 bottle of canola oil, 32 ounces
FOR THE GLAZE
- 3 cups powdered sugar
- 1/4 teaspoon salt
- 1/2 teaspoon vanilla extract
- 1/4 cup 2% milk
Instructions
If you have never made homemade donuts, take a minute to look at the pictures and tips above before starting this recipe. They are not hard to make, so don’t let the steps intimidate you.
FOR THE DONUTS
Preheat oven to 160 degrees and turn it off.
- Add the salt, shortening, 4 tablespoons of sugar, milk & water to a large saucepan. Bring to a boil over medium heat and set aside to cool.
- Add the yeast and 1/2 tablespoon of sugar to a cup of warm water, around 80 degrees. Use a spoon to push down on the granules of yeast, so that all of them get absorbed into the water. Allow the yeast mixture to rest for 5 minutes until the yeast starts to look bubbly on top.
- Add the egg, yeast mixture and vanilla to the cooled mixture in the saucepan. Add the flour, one cup at a time and mix with a wooden spoon until you’ve used about 3 1/2 cups of the flour. The mixture will be wet and sticky. Transfer the dough to a well-floured work surface, using the rest of the flour and add additional flour as needed. Note: See my pictures above this recipe. You do not have to need this dough. Simply work it with your hands until you can form it into a round ball that’s no longer sticky.
- Grease a large bowl. Place the dough top side down in the bowl, then flip it over. Place a towel over the bowl. Place the bowl inside of the warm oven and allow the dough to rise until it’s almost doubled in size. This will take about an hour. Just open the oven door after about 45 minutes to see how it’s doing.
- Time to punch down the dough. Using your fist gently punch down the dough in the bowl. Transfer the dough to a lightly floured work surface. Using a rolling pin, roll the dough out to about 1/3 to 1/2 inch in thickness. The thicker you roll the dough, the fewer donuts you’ll end up with. I used a donut cutter. Cut the doughnuts and place the doughnuts and doughnut holes on a cookie sheet that is lined with parchment paper. Make sure you leave some room between them. Place the cookie sheet in the warm oven and allow the doughnuts to rise until they almost doubled in thickness. This takes about 45 minutes.
- Meantime, get the oil ready. Add the canola oil to a large pot or dutch oven. Attach a candy thermometer to the side of the pot and heat the oil over medium heat, until it reaches 350 degrees. I do this about the last 10 minutes that the donuts are rising in the oven.
- Once the donuts have risen, drop one of the donut holes in the hot oil to see if it’s the correct temperature. Note: I use a thermometer but I still like to test the oil before adding all of the donuts.
- Add the donuts 2 to 3 at a time to the hot oil. Cook them until you see the bottom half of the donuts turn golden brown. Using a spider (see pictures above recipe), or a slotted spoon, flip the donuts over and brown the other side. This takes about 30 seconds per side. Make sure you only flip them once. Lift the donuts from the hot oil and transfer them to a wire rack that has been placed on a parchment paper lined cookie sheet. Leave the cookies on the wire rack until you glaze them.
FOR THE GLAZE
- In a medium bowl, whisk together the powdered sugar and salt. Add the vanilla and water and whisk until smooth and thin. If it’s a little too thick, add a little more milk. The glaze should be thin. Scoop up the drizzle with the whisk and shake it back and forth over the donuts. Leave the donuts on the wire rack until the glaze sets up, about 30 minutes.
- Store the donuts in an airtight container.
Notes
- Homemade donuts taste best on the day they are made. If you eat them the following day, wrap them in a paper towel and warm in the microwave for 10 seconds.
- Prep time includes rising time for both rises.